I hope this post will help many of you feel comfortable with using the Content Query Web Part.
In this post I will walk you through the process of creating a content query web part and configuring it to show custom field types. I will also give details on how to use XSLT to stylize and format the data being pulled.
I will be using the following scenario as an example. Say that you had a site collection with a top level publishing site. This publishing site would display a the most recent blog posts from all blog sites within its own site collection.
To solve this problem we will use a Content Query Web Part and a customized ItemStyle.xsl using XSLT.
Please note that the “SharePoint Server Publishing Infrastructure” needs to be enabled at the site collection to display the content query web part.
Step 1: Add a Content Query Web Part to Page
- Navigate to the site that you want the blog posts to show up and click on edit page.
- Under Editing Tools in the Ribbon, Click on insert > Web Part
- Under the Content Rollup Category Click on Content Query
- Then Click on the Add Button
- Now that you have a CQWP on the page edit the web part
- Expand open the “Query” properties
- Since we will be just showing blog post in this query choose the following
- List Type: Posts
- Content Type Group: List Content Types
- Content Type: Post
-
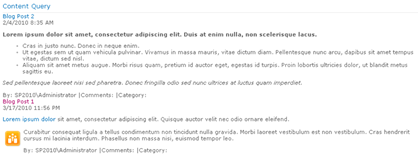
- You should get a result like the following.
- Next we will configure the web part to pull in additional values from the blog posts.
- Title – linked to post
- Date – with standard formatting
- Body – Rich text
- Author
- Number of Comments
- Categories
-
Step 2: Configure Web Part
- Click on web part arrow and choose “Export”
- Save the .webpart file to your desktop
- Edit the “Content_Query.webpart” file in Notepad
- Search for "CommonViewFields”
- Replace the default “<property name="CommonViewFields" type="string" />” with the following:
<property name="CommonViewFields" type="string">Title, Text;PublishedDate, DateTime;Body, RichHTML;Author, Text;NumComments, Lookup;PostCategory, Lookup;</property>
- Here are the available Field Types that can be used
- Text
- Note
- Number
- Currency
- Integer
- Boolean
- DateTime
- Threading
- Lookup
- Choice
- URL
- Counter
- RichHTML
- Image
-
- When creating your own there are a few rules.
- First off you need to separate each custom field type by a semi colon (Ex: Title, Text;Editor, Text)
- There cannot be a space after the semi colon
-
- Save the .webpart file
- Edit the page again and choose Inster Web Part
- It’s a little hard to find but click on the Upload a Web Part and browse for the custom .webpart file.
- Click on Upload
- Now when you click on Insert webpart you will see a category of imported webparts.
- Click on Add button.
- Now you will not see a difference but now the webpart has been configured to display these custom columns.
Step 3: Configure ItemStyle.xsl
- Click on View All Site Content > Style Library > XSL Style Sheets
- Download the itemstyle.xsl file
- Add the following to the top of the file
xmlns:ddwrt="http://schemas.microsoft.com/WebParts/v2/DataView/runtime"
- At the very bottom of the xsl file add the following template
<xsl:template name="BlogPost" match="Row[@Style='BlogPost']" mode="itemstyle">
<xsl:variable name="SafeLinkUrl">
<xsl:call-template name="OuterTemplate.GetSafeLink">
<xsl:with-param name="UrlColumnName" select="'LinkUrl'"/>
</xsl:call-template>
</xsl:variable>
<xsl:variable name="DisplayTitle">
<xsl:call-template name="OuterTemplate.GetTitle">
<xsl:with-param name="Title" select="@Title"/>
<xsl:with-param name="UrlColumnName" select="'LinkUrl'"/>
</xsl:call-template>
</xsl:variable>
<div class="custom_posttitle">
<xsl:call-template name="OuterTemplate.CallPresenceStatusIconTemplate"/>
<a href="{$SafeLinkUrl}" title="{@LinkToolTip}">
<xsl:if test="$ItemsHaveStreams = 'True'">
<xsl:attribute name="onclick">
<xsl:value-of select="@OnClickForWebRendering"/>
</xsl:attribute>
</xsl:if>
<xsl:if test="$ItemsHaveStreams != 'True' and @OpenInNewWindow = 'True'">
<xsl:attribute name="onclick">
<xsl:value-of disable-output-escaping="yes" select="$OnClickTargetAttribute"/>
</xsl:attribute>
</xsl:if>
<xsl:value-of select="$DisplayTitle"/>
</a>
</div>
<xsl:variable name="StartDate">
<xsl:value-of select="ddwrt:FormatDateTime(string(@PublishedDate), 1033, 'g')" />
</xsl:variable>
<div class="custom_date">
<xsl:value-of select="$StartDate" />
</div>
<div class="custom_description">
<xsl:value-of select="@Body" disable-output-escaping="yes" />
</div>
<div>
<table class="custom_postdetails" border="0" cellpadding="0" cellspacing="0">
<tr>
<td class="custom_author">
By: <xsl:value-of select="@Author" /> |
</td>
<td class="custom_comments">
Comments: <xsl:value-of select="@NumComments" /> |
</td>
<td class="custom_category">
Category: <xsl:value-of select="@PostCategory" />
</td>
</tr>
</table>
</div>
</xsl:template>
- Save the file and upload it to back up to the style library
Step 4: Apply Custom XSL style to content query
- Modify the Content Query Web Part again
- Expand open The Presentation Category
- Choose the custom “BlogPost” style
- Save the page and you should now see the blog post with the following data and format.


0 Yorumlar